How to Diffuse Curly Hair: A Complete Guide to Perfect Curls
11 min readContents:
- Why Diffusers Matter for Curly Hair
- Essential Prep: Setting Your Hair Up for Success
- Washing and Conditioning
- The Plopping Method
- Styling Products for Hold and Definition
- How to Diffuse Curly Hair: The Step-by-Step Technique
- Temperature and Speed Settings
- Loading Your Curls onto the Diffuser
- The Stationary Hold
- Micro Movements
- Timing and Drying Progress
- Common Mistakes to Avoid
- Diffuser Drying vs. Air Drying: Which Is Right for You?
- Product Recommendations for Diffuser Success
- Adapting the Technique to Your Hair Type
- Loose Waves (2A-2C)
- Medium Curls (3A-3C)
- Tight Coils (4A-4C)
- Troubleshooting Common Diffuser Problems
- Frizz After Diffusing
- Flat, Limp Curls
- Uneven Drying
- Loss of Definition Partway Through the Day
- Frequently Asked Questions
- How often should I diffuse my curls?
- Can I diffuse dry curls for styling?
- What’s the difference between diffusing and plopping?
- Do I need to use products to diffuse successfully?
- How do I know when my curls are done drying?
- Making Diffuser Drying Part of Your Routine
In the 1970s, when the diffuser attachment first arrived on the haircare scene, it revolutionised how people with curly hair could dry their locks. Before that, blow-drying curly hair meant frizz, deflation, and hours of frustration. The diffuser changed everything by dispersing air gently rather than blasting it straight onto curls. Fast forward to 2026, and this humble attachment remains one of the most valuable tools in any curly-haired person’s arsenal.
If you’ve picked up a diffuser but aren’t quite sure how to use it properly, you’re not alone. Many people invest in one and then struggle to get results that match those glossy before-and-after photos. The good news? Learning how to diffuse curly hair is entirely achievable, and the technique makes a genuine difference to how your curls look, feel, and last throughout the day.
Why Diffusers Matter for Curly Hair
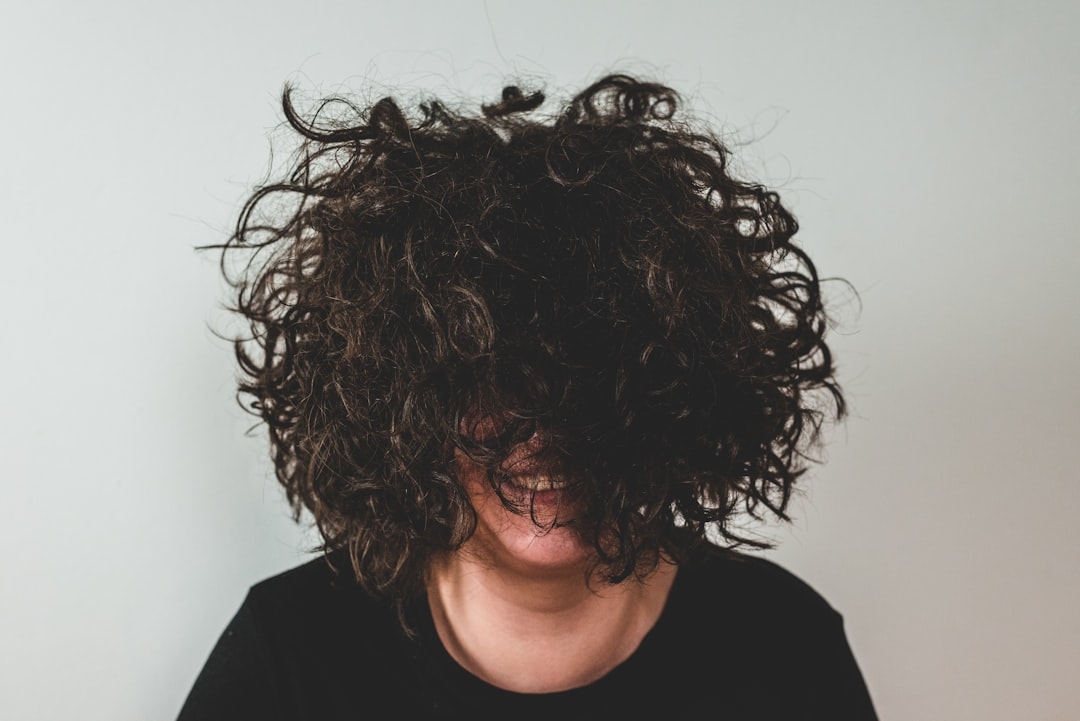
A diffuser is essentially a nozzle that attaches to your blow dryer. Instead of concentrating hot air into a narrow stream, it spreads the airflow over a wider, gentler area. This matters enormously for curls because traditional blow-drying methods—even with a standard nozzle—can disrupt your curl pattern by hitting it head-on. The result is often limp, frizzy curls that lose their natural bounce.
Curly hair is structurally more delicate than straight hair. The bends and curves in your hair shaft mean the outermost layer (the cuticle) isn’t as tightly sealed. This makes curls more prone to frizz and moisture loss. A diffuser respects this structure by using gentler air circulation. Studies on haircare show that diffuser drying reduces breakage by up to 30% compared to direct blow-drying, and it helps lock in moisture better when used with the right technique.
Beyond the science, there’s a practical benefit: speed. While air-drying curly hair can take 4-6 hours, using a diffuser cuts that down to 20-40 minutes, depending on your hair length and thickness. For people with busy schedules, that’s a game-changer.
Essential Prep: Setting Your Hair Up for Success
Before you even turn on the dryer, preparation is crucial. Your curls won’t diffuse beautifully if your foundation isn’t solid.
Washing and Conditioning
Start with freshly washed hair. Use a curl-friendly shampoo or co-wash (conditioner wash) that doesn’t strip moisture. Many curly-haired people find that traditional lathering shampoos leave their curls dry and unmanageable. Products like Cantu Shea Butter Co-Wash (around £7-8 in UK shops) or SheaMoisture lines work well for most curl types. Apply a generous amount of leave-in conditioner whilst your hair is still soaking wet—this is non-negotiable if you want hydrated, defined curls.
The Plopping Method
After washing, gently squeeze out excess water with your hands. Here’s where many people go wrong: they rub their hair with a towel, which disrupts the curl pattern and causes frizz. Instead, use a microfiber towel, a cotton t-shirt, or a dedicated hair plopping towel. Wrap your damp hair on top of your head for 15-20 minutes to remove water without disturbing your curls. This step reduces drying time significantly and helps your curl pattern settle before the diffuser does its work.
Styling Products for Hold and Definition
Apply your chosen styling products to dripping-wet hair. This might be a curl-defining gel, mousse, or cream—what works best depends on your curl type and personal preference. Apply products with a praying hands method (smoothing between your palms and running through your hair) or the scrunching method (bunching product into your curls from underneath). Make sure every section has product; this creates definition and prevents frizz as you dry.
How to Diffuse Curly Hair: The Step-by-Step Technique
Now for the main event. Here’s how to diffuse curly hair effectively:
Temperature and Speed Settings
Set your blow dryer to medium heat and low speed. High heat can damage curls and cause frizz by opening the hair cuticle, and high speed defeats the purpose of using a diffuser. The gentleness of the tool only works if your settings support it. If your dryer has a cool-shot button, use it at the end to seal your curls.
Loading Your Curls onto the Diffuser
This is the technique that makes or breaks your results. Take a section of hair and gently place your curls into the diffuser cup, allowing them to sit against the prongs. Don’t force or cram your hair in. Instead, let it rest naturally in the diffuser head. You’re cradling your curls, not strangling them.
Work in sections. If you have shoulder-length or longer hair, divide your head into 4-6 sections using clips. Dry one section at a time, moving from the sides and back towards the crown last (the crown takes longest).
The Stationary Hold
Here’s a game-changing tip that separates good diffusing from great diffusing: hold the diffuser steady against your scalp or hair for 20-30 seconds without moving it. This allows your curls to form against the prongs and start setting. Resist the urge to jiggle, wiggle, or move the diffuser around constantly. Once those 20-30 seconds are up, gently lower it or move to the next section, but keep the dryer running throughout.
Micro Movements
Once your initial hold time is complete, you can make very small, gentle movements—think of scrunching with the diffuser rather than sweeping motions. Lift and lower slightly, or rock back and forth gently. The goal is to encourage curls upward whilst drying without disrupting them. Avoid dragging the diffuser down your hair or making large motions that flatten your curls.
Timing and Drying Progress
Expect to spend 8-12 minutes per section, depending on hair thickness. Your curls should go from wet to damp to about 80% dry before you move away from that section. You want some moisture remaining because completely drying each section before moving on can lead to frizz. The final 10-20% dries with residual heat and air circulation.
Don’t try to fully dry your hair with the diffuser from start to finish. Once your curls have set and are mostly dry, you can use the cool shot function or stop styling and allow them to air-dry the last bit. This final cool-down helps seal the cuticles and locks in your curl shape.
Common Mistakes to Avoid
Learning how to diffuse curly hair means understanding what not to do:
- Using too much heat: High heat is the enemy of curls. It causes frizz, loss of curl definition, and potential heat damage. Medium heat or even low heat is sufficient with a diffuser.
- Moving the diffuser constantly: Curls need time to form. Constantly repositioning the diffuser doesn’t allow them to set properly.
- Diffusing completely dry hair: Diffusers work best on damp hair. Trying to refresh or restyle completely dry curls with a diffuser often results in frizz rather than definition.
- Skipping the prep: Going straight from shower to diffuser without proper conditioning and product application wastes the diffuser’s potential. Your curls need moisture and hold to show their best.
- Not sectioning: Attempting to diffuse all your hair at once means some sections get overdried whilst others stay too wet. Small sections = better results.
- Forgetting the cool shot: The final cool-down is essential for sealing your curl pattern and reducing frizz. Don’t skip this step.
Diffuser Drying vs. Air Drying: Which Is Right for You?
A common source of confusion is whether to use a diffuser or simply air-dry. These aren’t the same thing, and they serve different purposes.
Air drying means letting your hair dry naturally without any heat or tools. It’s gentler and requires no equipment, but it’s slow (4-6+ hours depending on thickness) and may leave curls less defined if you don’t have strong curl memory or the right product combination.
How to diffuse curly hair is an active process using heat and a specific tool. It’s faster, gives you more control over definition and volume, and produces more consistent results across your entire head of hair. The trade-off is that you’re using heat, which requires proper technique to avoid damage.
Neither method is objectively better—it depends on your lifestyle, hair type, and styling goals. Many people use a combination: air-drying on work-from-home days and diffuser-drying on mornings when they need to leave the house quickly. Both are valid.
Product Recommendations for Diffuser Success
Your styling products matter as much as your technique. Here are some UK-available options across different price points:
- Budget option: Cantu Shea Butter Leave-In Conditioning Repair Cream (£3-4). Affordable and effective for most curl types, widely available in supermarkets and online.
- Mid-range: SheaMoisture Coconut & Hibiscus Curl Enhancing Smoothie (£6-8) or Kinky-Curly Knot Today Detangler and Leave-in Conditioner (£10-12 from specialist stockists).
- Premium: Ouai Curl Jelly (£18-20) or Carol’s Daughter Black Vanilla Moisture & Shine Curl Gel (£12-15).
- Gel for hold: Eco Styler Gel (£2-3, excellent value) or Uncle Funky’s Daughter Curly Magic (£8-10) for stronger hold and definition.
The right product for you depends on your curl pattern, porosity, and density. What works beautifully for loose waves might weigh down tight coils, and vice versa. Experiment to find your match—and remember that combining a lightweight leave-in conditioner with a curl gel often produces better results than relying on one product alone.
Adapting the Technique to Your Hair Type
Curly hair isn’t one-size-fits-all. Your curl pattern, density, and porosity all influence how you should approach diffuser drying.
Loose Waves (2A-2C)
Looser curl patterns benefit from gentler treatment. Use low heat and low speed. You may need less drying time (5-8 minutes per section) because waves dry faster than tighter coils. Focus on scrunching to encourage curl formation rather than aggressive diffusing.
Medium Curls (3A-3C)
This range is where most people see the biggest transformation from diffuser drying. You have enough curl pattern to hold definition but enough body to respond well to the technique. Standard medium heat and low speed work well. Spend 8-12 minutes per section and use that stationary hold technique to encourage coil formation.
Tight Coils (4A-4C)
Tighter curl patterns are more prone to dryness, so prioritise moisture above all else. You might use slightly more product and consider a slightly longer drying time (12-15 minutes per section) on lower heat to ensure curls are thoroughly dried without being overdried. Moisture retention is critical—don’t let heat pull all the dampness out too quickly.
Troubleshooting Common Diffuser Problems
Frizz After Diffusing
Frizz usually means one of three things: insufficient moisture in your hair before diffusing, heat that’s too high, or incomplete drying allowing the cuticle to remain partially open. Solution: Use more leave-in conditioner, lower your heat setting, and ensure you dry to about 85-90% completion before stopping.
Flat, Limp Curls
This often happens when you don’t use enough product or when you overmove the diffuser. Solution: Apply product more generously and ensure you’re using that stationary hold technique for at least 20 seconds per section.
Uneven Drying
Different sections drying at different rates usually means you’re spending too long on some sections and not enough on others. Solution: Set a timer for each section and commit to working systematically—same timing per section throughout.
Loss of Definition Partway Through the Day
Sometimes curls look great when you finish drying but fall flat by afternoon. This indicates insufficient gel hold or that your curls needed to dry a bit more. Solution: Try a firmer-hold gel or allow curls to cool completely before touching them (at least 30 minutes).
Frequently Asked Questions
How often should I diffuse my curls?
This depends on your hair health and styling routine. Some people diffuse every wash day; others reserve it for special occasions. If you’re new to diffusing, start with once a week and observe how your hair responds. If you notice increased dryness or damage, reduce frequency. Many people with healthy curls diffuse 2-4 times per week without issues.
Can I diffuse dry curls for styling?
You can refresh dry curls with a diffuser if you mist them with water or leave-in spray first, but you won’t get the same curl-setting benefits as diffusing damp hair from a wash. True diffuse drying is a wash-day styling method. For refreshing curls between washes, light refresher sprays and scrunching work better.
What’s the difference between diffusing and plopping?
Plopping uses a towel to gently remove water and allow curls to form without heat or tools. Diffusing uses a blow dryer with a diffuser attachment and heat to speed up drying whilst setting curls. Plopping is gentler but slower; diffusing is faster but involves heat. Many people plop first, then diffuse for the final 20% of drying.
Do I need to use products to diffuse successfully?
Technically, you can diffuse without products, but you’ll get much better results with at least a leave-in conditioner and ideally a styling gel or cream. Products provide moisture, definition, and hold—all things that make your diffuser-dried curls look polished rather than flat.
How do I know when my curls are done drying?
Your curls are done when they feel cool to the touch and spring back when you gently lift them. They should be completely dry or nearly so—no dampness at the roots. If they’re still wet, they’ll fall flat as they continue drying. If they’re completely dry and crispy, you’ve overdried them. The sweet spot is 85-95% dry when you finish the diffuser, with the very last bit drying naturally.
Making Diffuser Drying Part of Your Routine
Starting a new styling technique can feel overwhelming, but once you understand the principles, it becomes second nature. The first time you try this method, give yourself extra time—maybe 45 minutes rather than rushing. You’re learning where to hold the diffuser, how long each section needs, and how to read your curls’ progress.
By your third or fourth wash day using this technique, you’ll move faster and more confidently. Your curls will start responding predictably. You’ll develop a feel for the right product combination for your hair and the exact timing that works for your density and curl pattern.
From there, you can start experimenting: trying different gels for varying levels of hold, adjusting heat settings for different seasons, or mixing techniques like combining plopping with diffusing. The foundation you build with these core techniques opens up endless refinement possibilities.
The goal isn’t perfection on day one. It’s developing a reliable technique that works for your unique curls, saves you time compared to air-drying alone, and lets you see your curls at their best. Learning how to diffuse curly hair is an investment in your hair’s health and your daily confidence. Once you’ve mastered it, you’ll wonder how you ever managed without it.