How to Get Textured Hair: Master the Art of Transforming Your Locks
8 min readContents:
- Understanding Hair Texture: What It Really Means
- How to Get Textured Hair: Core Methods Explained
- Heat-Based Texturing Techniques
- Chemical Texturising Treatments
- Salt Spray and Product-Based Methods
- Step-by-Step: Creating Textured Hair at Home
- Sustainable and Eco-Conscious Texture Solutions
- What the Pros Know: The Insider Secrets
- Common Mistakes That Ruin Textured Hair
- Making Texture Last: Maintenance Tips
- Choosing Your Method: A Quick Comparison
- Frequently Asked Questions
- How long does it take to get textured hair?
- Can I get textured hair if my hair is very straight?
- Is it damaging to create texture regularly?
- What products work best for holding texture?
- Can I wash textured hair daily?
- Next Steps: Starting Your Texture Journey
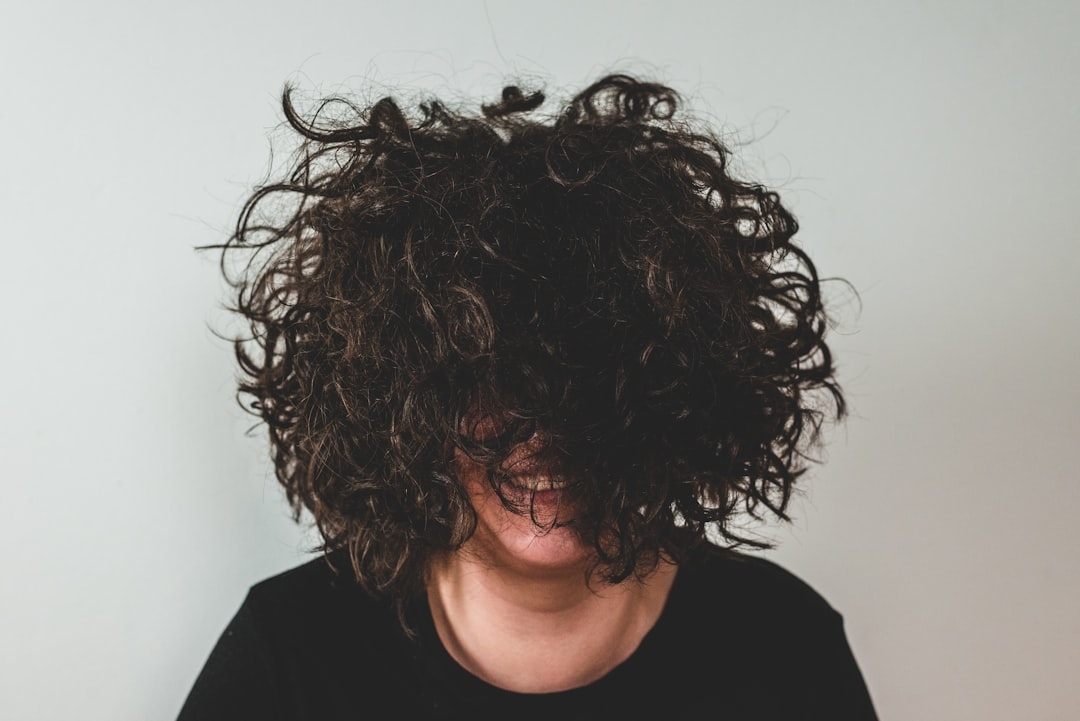
Picture this: you’re running your fingers through your hair and feeling that satisfying resistance, that beautiful wave and dimension that catches the light just so. Textured hair has become the hallmark of effortless, modern style—and the brilliant news is that you don’t need a salon appointment or expensive treatments to achieve it. Whether your natural hair is pin-straight or you’re looking to enhance what you’ve already got, creating texture is entirely within your reach.
Understanding Hair Texture: What It Really Means
Before you begin the process of creating texture, it helps to understand what we’re actually talking about. Hair texture refers to the pattern, wave, and dimension in your strands—everything from loose waves to defined curls to zigzag patterns. It’s not about thickness (that’s hair density) or health (though those matter too). Texture is purely about the three-dimensional structure of your hair shaft.
The natural texture your hair falls into depends on your hair follicles’ shape. Round follicles produce straight hair, while flattened or elliptical follicles create waves and curls. But here’s the encouraging truth: you can temporarily or semi-permanently alter your hair’s natural pattern to create texture where there wasn’t any before.
How to Get Textured Hair: Core Methods Explained
There are several established techniques for creating texture, each with different longevity, effort levels, and results. Let’s work through the most practical options.
Heat-Based Texturing Techniques
Using heat tools to create texture has been a staple for decades. The most common approach involves using a curling iron, waving iron, or braiding method combined with heat. Here’s what actually works:
The Curling Iron Method: This is the most controlled way to add texture. A 25mm to 32mm barrel (depending on your hair length) will give you defined waves. Start with clean, dry hair or hair that’s about 80% dry. Divide your hair into sections roughly 2 inches wide. Wrap each section around the barrel away from your face, hold for 8 to 15 seconds depending on your hair’s thickness, then release. The result lasts 24 to 48 hours depending on your hair’s natural texture and humidity.
The Braid Method: Dampen your hair to about 60% dryness, divide it into 2 to 4 thick braids (depending on the wave size you want), then use a heat tool to gently pass over each braid or sit under a hood dryer for 30 to 45 minutes. Unravel when completely cool. This creates a consistent wave pattern across your entire head and lasts 3 to 5 days.
Chemical Texturising Treatments
If you want semi-permanent texture that lasts 12 to 16 weeks, a perming treatment is the solution. Modern perms are far gentler than their 1980s reputation suggests. A perm restructures the protein bonds in your hair using chemistry, then sets them into a new wave pattern.
Costs in the UK range from £80 to £250 depending on hair length and salon location. The process takes 2 to 3 hours. You’ll need to wait 48 hours before washing and avoid harsh treatments for two weeks afterwards. The texture gradually softens as it grows out, which some people prefer to the “click off” of heat-created waves.
Perms work best on hair that’s in good condition—if your hair is already compromised, this isn’t the method for you.
Salt Spray and Product-Based Methods
For temporary texture that mimics a beach wave effect, salt spray is your friend. Applied to damp hair, salt spray adds grit and grip, encouraging your hair to hold a wavy shape. The effect typically lasts until your next wash and is entirely reversible.
Look for products with actual sea salt (around £12 to £18 per bottle). Apply sparingly to damp sections, then either blow-dry with your head sideways or air-dry for soft waves. Some people combine this with a light curl cream underneath for extra hold.
Step-by-Step: Creating Textured Hair at Home
Let’s walk through a complete process you can do this weekend with tools you probably already own.
- Start with the right foundation. Wash your hair with a volumising shampoo (texture shows better on clean hair without product buildup). Condition only the ends, not the roots.
- Dry your hair 80% of the way. Completely dry hair can be harder to work with; slightly damp hair accepts texture more readily.
- Apply a heat protectant spray. This reduces damage from heat styling and helps texture hold longer. Spray from about 15cm away, covering all sections evenly.
- Section your hair systematically. Using clips, divide your hair into 4 to 6 sections depending on thickness. Work from the bottom layers upward.
- Create the texture using your chosen method. Whether curling, braiding, or spraying, work deliberately and take your time. Rushed texture looks patchy.
- Let it cool completely. Don’t touch it for at least 10 minutes. Heat-set texture needs to cool to hold properly.
- Gently separate and shape. Once cool, use your fingers (not a brush) to separate curls or waves. Brush through too soon and you’ll lose the definition.
Sustainable and Eco-Conscious Texture Solutions
If you’re concerned about the environmental impact of repeated heat styling or chemical treatments, there are gentler alternatives worth considering.
Sustainable Product Choices: Opt for heat protectants and texturising products in glass bottles or refillable containers rather than plastic. Brands like Unwrapped Life and Package Free Shop offer sustainable hair care options starting at £15 to £25. These work just as well as conventional products while reducing your waste footprint.
Air-Drying Techniques: Instead of blow-drying (which uses energy), braid damp hair or use the diffuser attachment on a lower heat setting. This creates natural texture with minimal environmental cost and is gentler on your hair long-term.
Reduced-Chemical Alternatives: Instead of permanent perms, consider semi-permanent texture treatments or commit to regular braiding and air-drying. You’ll use less water for washing (since you can extend time between washes with textured hair) and avoid sending processed chemicals down the drain.
What the Pros Know: The Insider Secrets
Professional stylists understand that texture is about layering techniques, not relying on a single method. A top colourist in London explains: the best textured looks combine multiple approaches. They might apply a light perm to the roots (where hair is typically straighter and harder to texture), then use heat styling on the mid-lengths and ends. They also always, always apply heat protectant before any heat tool. It’s not optional—it’s the difference between hair that holds texture beautifully and hair that looks frizzy and damaged.
Common Mistakes That Ruin Textured Hair
Even with the right technique, small errors can sabotage your results.
- Over-brushing: Brushing through textured hair while it’s warm or shortly after creation destroys the pattern. Wait until it’s completely cool, then use your fingers or a wide-tooth comb.
- Skipping heat protectant: Every. Single. Time. Your hair will suffer cumulative damage without this barrier, and texture won’t hold as well.
- Using the wrong barrel size: A barrel that’s too large creates loose waves (if you want tighter waves); too small creates kinks. For most shoulder-length hair, 25mm to 32mm is ideal.
- Not sectioning properly: Random, thick sections create uneven texture. Smaller, consistent sections look intentional and polished.
- Working with dirty hair: Product buildup prevents proper texture formation. Always start with clean hair.
Making Texture Last: Maintenance Tips
Once you’ve created beautiful texture, these practices keep it looking fresh:
- Sleep strategically: Use a silk pillowcase or wrap your hair in a silk scarf. Cotton pillowcases create friction that degrades texture overnight.
- Dry shampoo between washes: Dry shampoo adds grit and grip, extending texture life to 5 to 7 days. Try Batiste (£3 to £4) or Made By Bessie (£12 for a refillable option).
- Minimal heat on established texture: Once you’ve created texture, avoid running a straightener or blow-dryer through it. Just scrunch with your hands or use a diffuser if you must use heat.
- Refresh with braiding: On day 3 or 4, braid damp hair loosely and leave overnight. This refreshes texture without any heat or products.
- Use a texture cream or serum: Products with polymers and resins help texture hold longer and look shinier. Apply to damp hair before blow-drying.
Choosing Your Method: A Quick Comparison
Different methods suit different situations. Here’s how they stack up:
| Method | Duration | Cost | Effort |
| Curling iron | 24-48 hours | £30-£80 tool | Medium |
| Salt spray | Until wash | £12-£18 | Low |
| Braiding/air-dry | 3-5 days | Free | Low |
| Chemical perm | 12-16 weeks | £80-£250 | Professional only |
Frequently Asked Questions
How long does it take to get textured hair?
Heat-created texture takes 20 to 45 minutes depending on your method and hair length. A chemical perm takes 2 to 3 hours at a salon. Salt spray or braiding methods take 10 to 15 minutes plus overnight setting time.
Can I get textured hair if my hair is very straight?
Yes. Very straight hair (typically with round follicles) can still accept texture through heat styling, chemical perms, or product-based methods. It may not hold texture quite as long as wavy hair naturally would, but the results are absolutely achievable. You might need slightly more heat or a stronger perm solution, which is why consulting a professional stylist is helpful.
Is it damaging to create texture regularly?
Heat styling with proper heat protection is safe for weekly use. Chemical perms should be spaced 12 to 16 weeks apart to allow your hair to recover. Braiding and air-drying methods are essentially damage-free. The key is always using heat protectant and avoiding back-to-back harsh treatments.
What products work best for holding texture?
Texture sprays with light hold are ideal—they add grip without weighing hair down. Cream-based products work for waves; gel-based products work for tighter curls. Look for products with polymers or resins. Avoid silicone-heavy serums, as these can make texture slippery and harder to hold.
Can I wash textured hair daily?
Daily washing strips natural oils that help texture hold. Wash every 3 to 4 days and use dry shampoo between washes. When you do wash, use cooler water (heat opens the hair cuticle and releases texture) and avoid over-scrubbing the roots. Sulfate-free shampoo also preserves texture longer.
Next Steps: Starting Your Texture Journey
Creating textured hair is a practical skill that improves with repetition. Your first attempt might be imperfect—that’s entirely normal and part of the learning process. Start with a simple method like salt spray or braiding to build confidence, then explore heat styling or perms once you understand how your hair responds.
Consider keeping a brief note on what worked: which barrel size, how long you held the heat, what product you used, how long the texture lasted. This personalised data becomes invaluable as you refine your technique. By 2026, there’s no shortage of tutorials and product options available—your task is simply to find what suits your hair type and lifestyle.
Your textured hair journey starts now. The tools are accessible, the techniques are learnable, and the results are absolutely worth the effort.